9 quick and easy wedding DIY projects
Lend a personal touch to your nuptials (while giving your big-day budget some relief)

A free daily email with the biggest news stories of the day – and the best features from TheWeek.com
You are now subscribed
Your newsletter sign-up was successful

Blame it on Pinterest or your craft-happy mom: Wedding DIY is here to stay.
That's because not only does creating your own signage, stationery, and other details lend a personal touch to your nuptials, but it also gives your big-day budget some relief.
But before you whip out the Mod Podge, a couple of wedding DIY reminders: First, be honest with yourself about your creative abilities. Redoing a project over and over until it looks just right could end up costing you more than buying a premade version.
The Week
Escape your echo chamber. Get the facts behind the news, plus analysis from multiple perspectives.

Sign up for The Week's Free Newsletters
From our morning news briefing to a weekly Good News Newsletter, get the best of The Week delivered directly to your inbox.
From our morning news briefing to a weekly Good News Newsletter, get the best of The Week delivered directly to your inbox.
Second, be realistic about how long each project will take to complete — and start early to avoid scrambling to finish right before your wedding day. "One of the biggest fails with DIY projects is waiting until the last minute to get going," says Courtney Lutkus, owner and event planner of Simply Radiant Events.
So with these ground rules in mind, we compiled nine trendy wedding DIYs that won't take you longer than a weekend to complete — or set you back more than about $150. So grab your partner, roll up those sleeves and let's get crafting.
Wedding DIYs you can craft in an hour
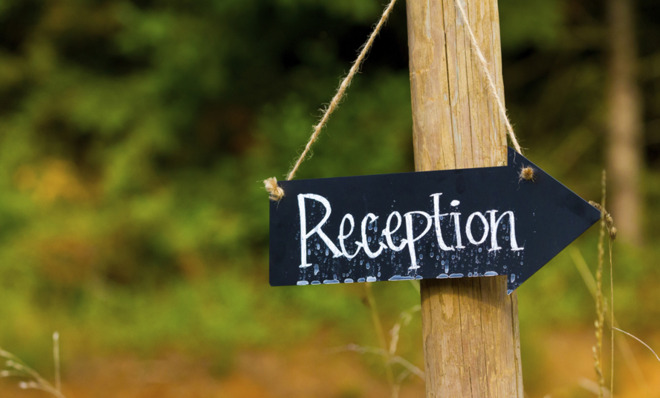
1. Custom chalkboard sign
A free daily email with the biggest news stories of the day – and the best features from TheWeek.com
From introducing the bridal party to displaying the reception menu, chalkboard signage continues to be a popular wedding idea, says Kristen Ley of Something New for I Do, a wedding vendor PR company.
"Crafty brides are creating chalkboards out of items that fit their theme — an antique door, room divider, mirror, or a window," Ley says. "The possibilities are endless."
Creating the chalkboard part of this project is a snap — depending on the material, you can cut adhesive chalkboard paper ($10) to fit and adhere it to the item (great for mirrors, frames, and silver trays) or paint it with chalkboard paint ($7), which works well for wood pieces. This tutorial shows you how to transform a frame for just $9.
Total DIY time: 30 to 60 minutes, based on if you're using chalkboard paper or paint.
Price: $50 and under if you scour flea markets and Craigslist for items, or use a piece of aged wood for a more rustic look. The key is to buy something you can reuse post-wedding — like a mirror you can hang in your home's entryway.
Savings: Ready-made signs on Etsy.com can cost as much as $115.
2. Fresh-cut flower crowns
The recent bohemian trend has sparked a rise in brides donning flower crowns in lieu of a traditional veil or bejeweled headpiece.
Using this tutorial as a guide, choose your blooms, then bend floral wire ($4) into a loop that will fit your head and wrap it with floral tape ($6). Then secure your flowers to the crown using additional tape.
Although we typically wouldn't suggest waiting until your wedding day to start a project, this one is an exception. "Make it the morning of, and keep it in a cool place because fresh flowers have a tendency to droop very easily," Lutkus says. If you want your bridesmaids to don them, too, make them the night prior and store in the fridge.
Total DIY time: One hour for each crown.
Price: Under $75, depending on the flowers — peonies and garden roses will cost a bit more, compared to gerber daisies. And fillers, like myrtle and baby's breath, are great options for budget-conscious brides who want a lush look for less.
Savings: $40-plus. Brides spend an average of $119 on a headpiece and veil, according to the Association of Bridal Consultants.
3. Glitter 'Mr. & Mrs.' letters
This sparkly banner can be strung across a classic sweetheart table, over the bar, or even on a trendy photobooth.
Start by downloading a free PDF template, and cut out the design using a craft knife ($6) on foam core ($2 per sheet). Then use spray adhesive ($5), glitter ($8 for an 8-oz. bottle), and a small paintbrush ($3 for a set) to give the sign its glitz.
Total DIY time: One hour. Cleanup, however, might take just as long: Glitter has a funny way of getting absolutely everywhere.
Price: About $30 for all the materials.
Savings: $18-plus. Similar glitter chair signs go for $48 on BHLDN.com. (More affordable banners from Etsy cost about $25, with shipping, but they may look a bit too handcrafted or not match your décor.)
Wedding DIYs you can craft in a single day
1. Confetti poppers
We've seen several iterations of this idea over time. "Years ago, you threw rice in the air, then it shifted to bubbles," Lutkus says. "Last year, the trend was for the bride and groom to run under a line of sparklers as they made their exit."
And this year? It's push-pop confetti — a very easy DIY project.
To make these festive yet oh-so-simple poppers, you cover toilet paper rolls (free, if you ask family and friends to save theirs) in pretty paper (like this chevron pattern from Paper Source, $30) and fill them with star confetti ($30 for 6 oz.), and paper confetti ($56 for 4 lbs.). Seal with tape ($4 for a three-pack), use twine ($4) to make a pull string, and stick on printable circle labels ($14) for guests' names.
Total DIY time: Invite your bridal party over to help, and you can easily bang out 100 of these in a day.
Price: $138 for 100 poppers — and you'll have plenty of spare paper to use for gift wrapping. It would make an excellent background for wedding signage too!
Savings: $350 to $1,000-plus. Already-crafted poppers on BHLDN.com are $12 each — which means they will set you back a whopping $1,200 if you buy them as favors for 100 guests.
2. Potluck dessert station
Doing a dessert bar has been popular over the past few years — and it's not going away anytime soon, says Sophie Spier, chief event manager at Amazing Days Events.
But she's seeing a new twist for 2014. "I have had several brides arrange for family members and friends to bring a 'signature dessert' to the wedding, instead of a traditional gift," she says. "And the fact that the desserts are all homemade and different is a bonus. There will never be another dessert station like that one — no matter how many weddings anyone ever attends."
Just make sure to carefully explain your vision, and take the time to confirm that everyone will be bringing something unique.
Total DIY time: While the hands-on setup time for this DIY may take only an hour on the day of, give yourself a day to conceptualize and coordinate your dessert bar, as well as gather any necessary materials, such as cake stands and trays.
Price: If each family member or friend brings a treat and cake stand or tray, this DIY is free. Yes, FREE.
Savings: About $386, which is the average amount a couple spends on their wedding cake or dessert spread.
3. Save-the-date postcards
This is a popular way to announce pending nuptials, but using a stationery company to create save-the-date postcards is often way more expensive — and less customizable — than going the DIY route.
Blogger Ashley of the Accidental Olympian DIY-ed 100 save-the-dates for just $55 by creating her own design via a visual editing program — many of them, like Photoshop, are available for free-trial use — and then uploading the design so it could be professionally printed. (Check LivingSocial or Groupon for deals, which is how she scored her big discount.)
Total DIY time: 5 to 8 hours. Budget a nice chunk of time for this one, especially if you're not familiar with graphic design or haven't decided what you want your design to be yet. Also plan on spending some time choosing just the right photo of the two of you, if you decide to include a picture. Printing them yourself can be a trial-and-error process that could take a few additional hours. Then you'll have to put all those stamps and return address stickers on.
Price: Around $50 for printing.
Savings: $60-plus. On Minted.com, 100 save-the-date postcards cost $115, not including tax and the cost of shipping.
Wedding DIYs you can craft in a weekend
1. Chuppah or ceremony arch
Every nuptials needs a focal point, and whether you're doing a traditional Jewish ceremony with a chuppah, or you just want a pretty frame on which to hang flowers, creating your own arch is far more affordable than renting.
To fashion a structure using this tutorial, you'll need four birch poles ($98), which you'll set with concrete ($10) into four decorative buckets ($40). (You'll also need a bucket for mixing the concrete, $3). For extra reinforcement, you can opt to use PVC pipe at the base of the poles. Then add on decorative items, such as a tallit, flowers, or streamers.
Total DIY time: Two days. By the time you let the concrete base set, you're looking at a weekend's worth of work. If you're adding a tallit (for a Jewish wedding) or other décor, budget an extra few hours.
Price: About $150.
Savings: $75. Renting a chuppah or a birch structure can run you around $225 — and, of course, you have to give it back after the wedding.
2. Embroidered vintage hankies
These handmade handkerchiefs can be used as gifts for the moms and bridal party — and they can even be carried instead of bouquets or nosegays (smaller bouquets sometimes carried by moms).
To create them, buy a pack of 16 vintage hankies at ShopSweetLulu.com ($30) and some embroidery thread ($10). If you have a sewing machine with embroidery settings, follow this tutorial on PrudentBaby.com. If you'd prefer to freehand it, check out this how-to by JennytheArtist for embroidering letters. (You'll need a $5 hoop and some regular computer paper for this one.)
Total DIY time: A weekend is a realistic timeline for this project if you are making them by hand. (I say this as a bride who made 10 hankies in one weekend, sans sewing machine, and with little previous sewing experience.)
Price: About $45 for 16 handkerchiefs. Plus, a gift that's handmade with love is priceless.
Savings: $70-plus per mother or bridesmaid. (More traditional gifts for your maids, mom and mother-in-law, like the popular Kate Spade tie-the-knot bracelet, can range from $75 to $100 each.) If you use these hankies instead of bouquets, which can cost an average of $180, you'll save an additional $100-plus per maid or mom.
3. Colored mason jars
Renting containers for your centerpieces can get expensive, especially if you're going for a vintage look. So many couples choose to cut costs by DIY-ing this décor item.
"Mason jars have been a classic for a long time," Lutkus says. "Now brides are painting them to match their color scheme. Currently, pastels are 'in,' so you're seeing lots of soft pink, green, and purple mason jars."
Using this example as your guide, paint your jars (a set of 12 quart-size mason jars will cost around $10 at the grocery or hardware store) with water-resistant, scratch-resistant enamel paints ($12), and then use a nail file to distress them.
Total DIY time: 24 to 36 hours. (The actual hands-on time is a few hours or less, depending on how many jars you're painting. But to get the best results, you should allow them to dry for several hours or overnight before distressing them.)
Price: $1.80 per centerpiece container.
Savings: Renting bespoke or vintage-looking flower containers can cost anywhere from $3 to $10, and buying them off eBay is typically just as pricey.
This story was originally published on LearnVest. LearnVest is a program for your money. Read their stories and use their tools at LearnVest.com.
More from LearnVest...
-
 Film reviews: ‘Send Help’ and ‘Private Life’
Feature An office doormat is stranded alone with her awful boss and a frazzled therapist turns amateur murder investigator
-
 Movies to watch in February
the week recommends Time travelers, multiverse hoppers and an Iraqi parable highlight this month’s offerings during the depths of winter
-
 ICE’s facial scanning is the tip of the surveillance iceberg
IN THE SPOTLIGHT Federal troops are increasingly turning to high-tech tracking tools that push the boundaries of personal privacy