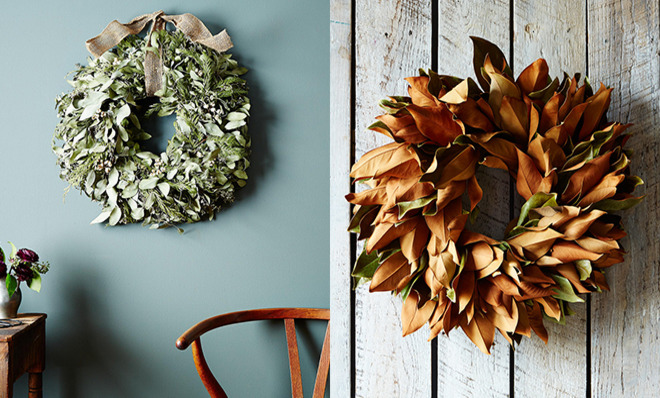
How to make a wreath, step by step
Go ahead: throw some eucalyptus on it

A free daily email with the biggest news stories of the day – and the best features from TheWeek.com
You are now subscribed
Your newsletter sign-up was successful

If you think of wreaths as staunchly holiday-only, we're here to convince you otherwise. With the right foliage, a wreath can work in any season — consider them a longer-lasting version of a bouquet. They're a beautiful way to decorate your door (actually, they're the only way we know how to decorate a door); they can last for months; they're hands-down the best hostess gift ever; and you can make them at home — even if you don't have hours of spare time or a penchant for crafting.
We brought in some experts to teach us the technique: the duo behind Franki Elizabeth, a floral design studio in New York. We're sharing their advice here.

Onto the wreath — you'll need the following:
The Week
Escape your echo chamber. Get the facts behind the news, plus analysis from multiple perspectives.

Sign up for The Week's Free Newsletters
From our morning news briefing to a weekly Good News Newsletter, get the best of The Week delivered directly to your inbox.
From our morning news briefing to a weekly Good News Newsletter, get the best of The Week delivered directly to your inbox.
- Metal wreath form (we used a 12-inch round form here but pick any size you like — you can find them online and at most craft stores)
- 22-gauge floral wire, cut into 5-inch strips
- Floral shears
- Wire cutter (use something sturdier than your floral shears)
- 3 different types of greenery (2 types of evergreen, like juniper or pine, and 1 type of a more delicate greenery like bay leaves, holly, magnolia, herbs, or flowers)
- Ribbon or twine for hanging

Here's how it's done:
- Lay out your greens, grouping them by type. It's a good idea to do this outdoors — or spread out some newspaper indoors if it's frigidly chilly. This can be a messy project, and you don't want to be sweeping up holly sprigs for days.
- Make six bunches of each type of greenery (for a total of 18 bunches). To make each bunch, cut four to five pieces of the greenery using your floral shears (good, sharp shears will make this task infinitely more easy). The pieces should be about five to seven inches long.
- Begin attaching the bunches — one by one — to your wire frame. Tie each bunch on with the five-inch pieces of wire. Each bunch should overlap with the previous one to cover the stems.
- Spin the wreath as you add on more bunches. Work in a counter-clockwise fashion until you come full circle.
- Once your wreath is complete, check for any gaps and adjust as needed. Depending on how polished you want your wreath to look, prune any excess stems or foliage. The end result should look have nicely landscaped curves around the outside.
- Hang your completed wreath with ribbon or twine. Keep in mind that a wreath is delicate, so if you're planning to gift yours, make sure it's carefully secured in a box when you transport it.

A few more tips from Franki Elizabeth:
- If you include flowers, pick a variety that will dry well and hold their shape — a dried wreath can last up to a year, and we're all for longevity when it comes to decorating. Hydrangeas and peonies both work beautifully.
- Don't feel confined by this formula! A wreath with a single type of greenery looks just as beautiful as one with three different plants woven together.
- When you begin layering, pay attention to covering the stems of each bunch. You want the finished wreath to look as full and lush as possible.
- For extra credit: Weave eucalyptus or lavender into your wreath to scent a foyer or room. It's prettier and more creative than a scented candle (and lasts longer too!).
This story was originally published on Food52.com: How to make a wreath, step by step
More from Food52...
A free daily email with the biggest news stories of the day – and the best features from TheWeek.com
-
 Minnesota's legal system buckles under Trump's ICE surge
IN THE SPOTLIGHT Mass arrests and chaotic administration have pushed Twin Cities courts to the brink as lawyers and judges alike struggle to keep pace with ICE’s activity
-
 Big-time money squabbles: the conflict over California’s proposed billionaire tax
Talking Points Californians worth more than $1.1 billion would pay a one-time 5% tax
-
 ‘The West needs people’
Instant Opinion Opinion, comment and editorials of the day